Showing posts with label Distress. Show all posts

Sunday, 28 January 2018

Winter Fun | GoGo Getaway

Today is my turn over on the GoGo Getaway Blog to showcase a technique previously taught at one of the GoGo Getaway events.


This month I have put my Silhouette Cameo machine to work so head over to see all the different techniques I managed to get on to one layout. I'm totally in love with this Bramble Fox perspextive that I used for my title.

Happy Crafting!

Thursday, 28 December 2017

So Fun | GoGo Getaway


I'm up on the GoGo Getaway Blog today with a layout focusing on using Distress Oxides and using the Crate Paper Maggie Holmes Carousel Collection.
Head over to the blog to see the full layout.


Happy Crafting!

Terri
x

Saturday, 30 September 2017

~ Tim Holtz | Creative Chemistry UK Workshop ~

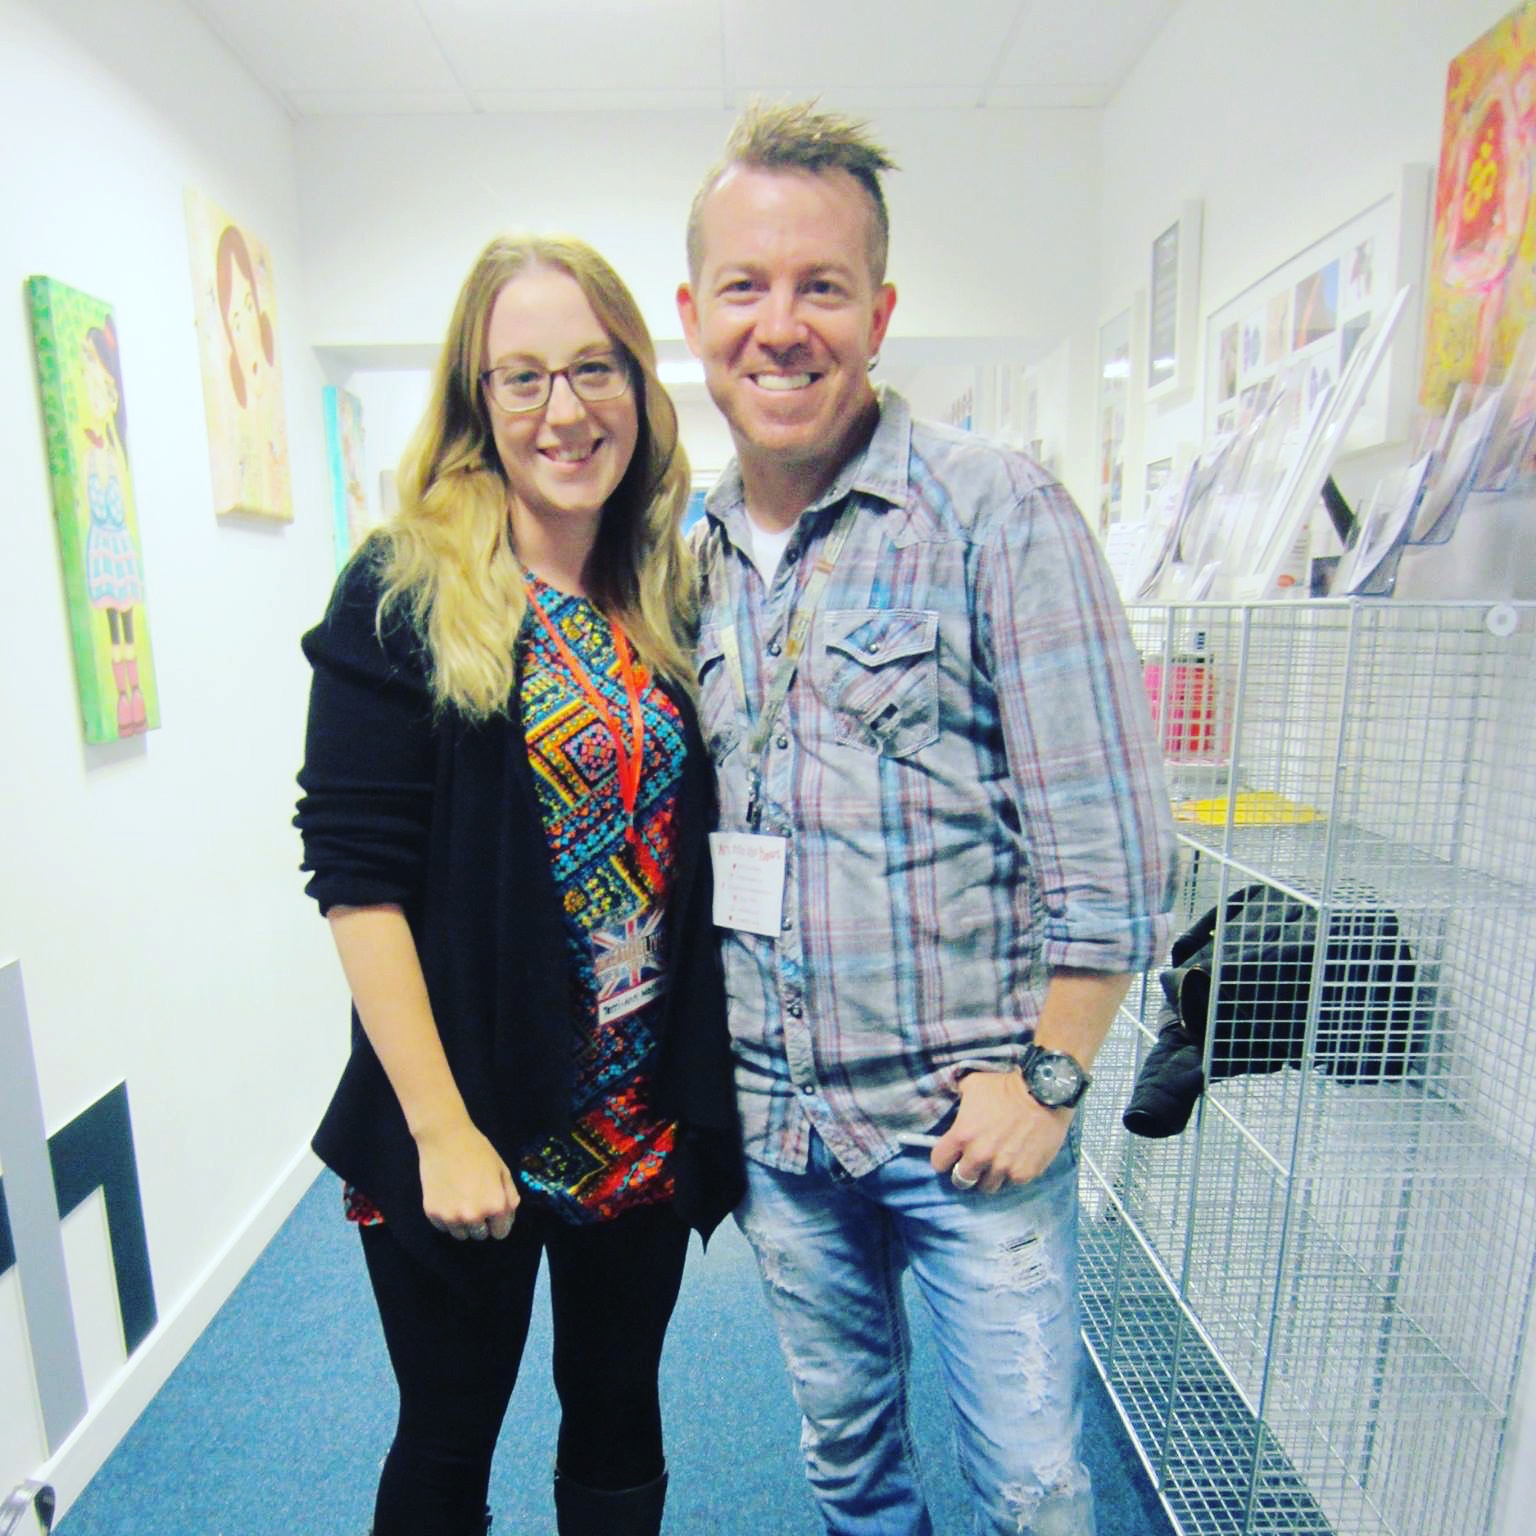
I was fortunate enough to be one of the few people who managed to get a spot on Tim Holtz's class at Art from the Heart in Harrogate. He ran the class 6 times and there were 24 of us in each class. It was a technique based class so it was all about learning how to create backgrounds using Distress products.


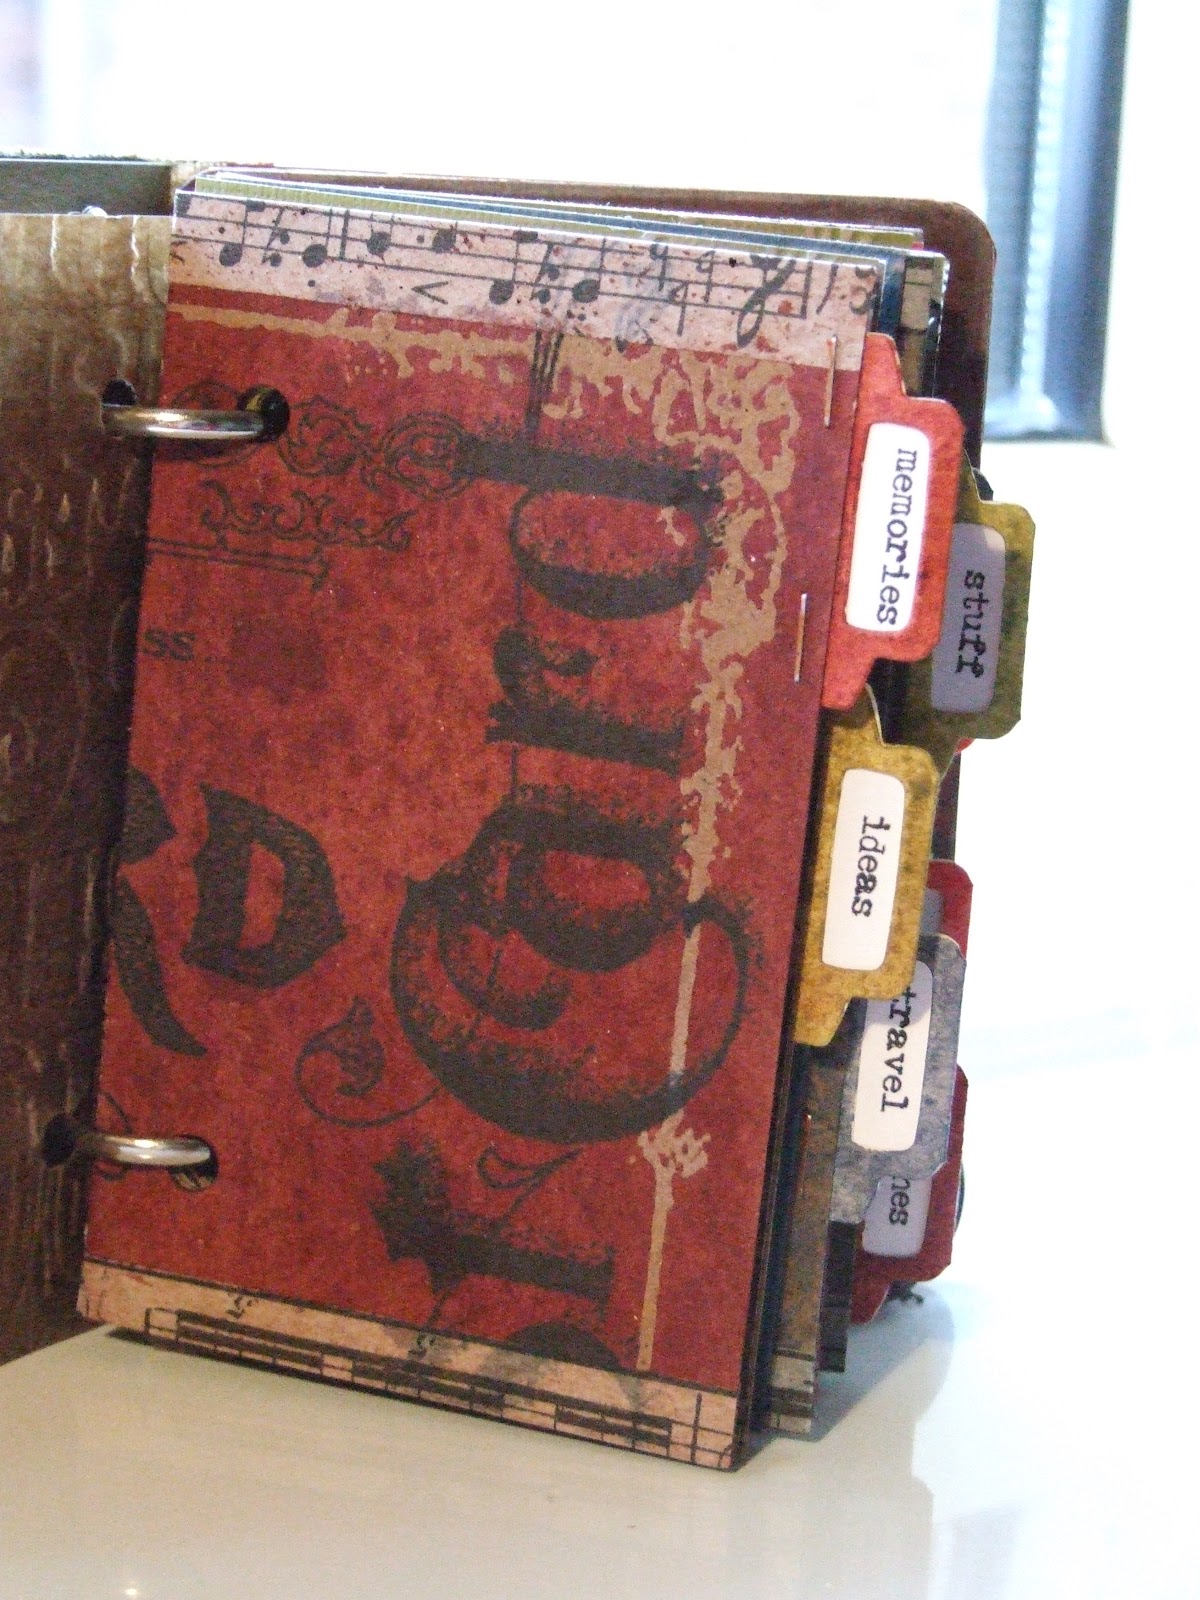
We go this cute little folder to store all our tags in at the end and a custom made 'Creative Chemistry UK edition' fabric label for the front. We were also given a few other treats too. The necklace to the right of the book is from his jewellery range for JoAnns store. Plus we got a tote bag from CHA, notebook and apron. 

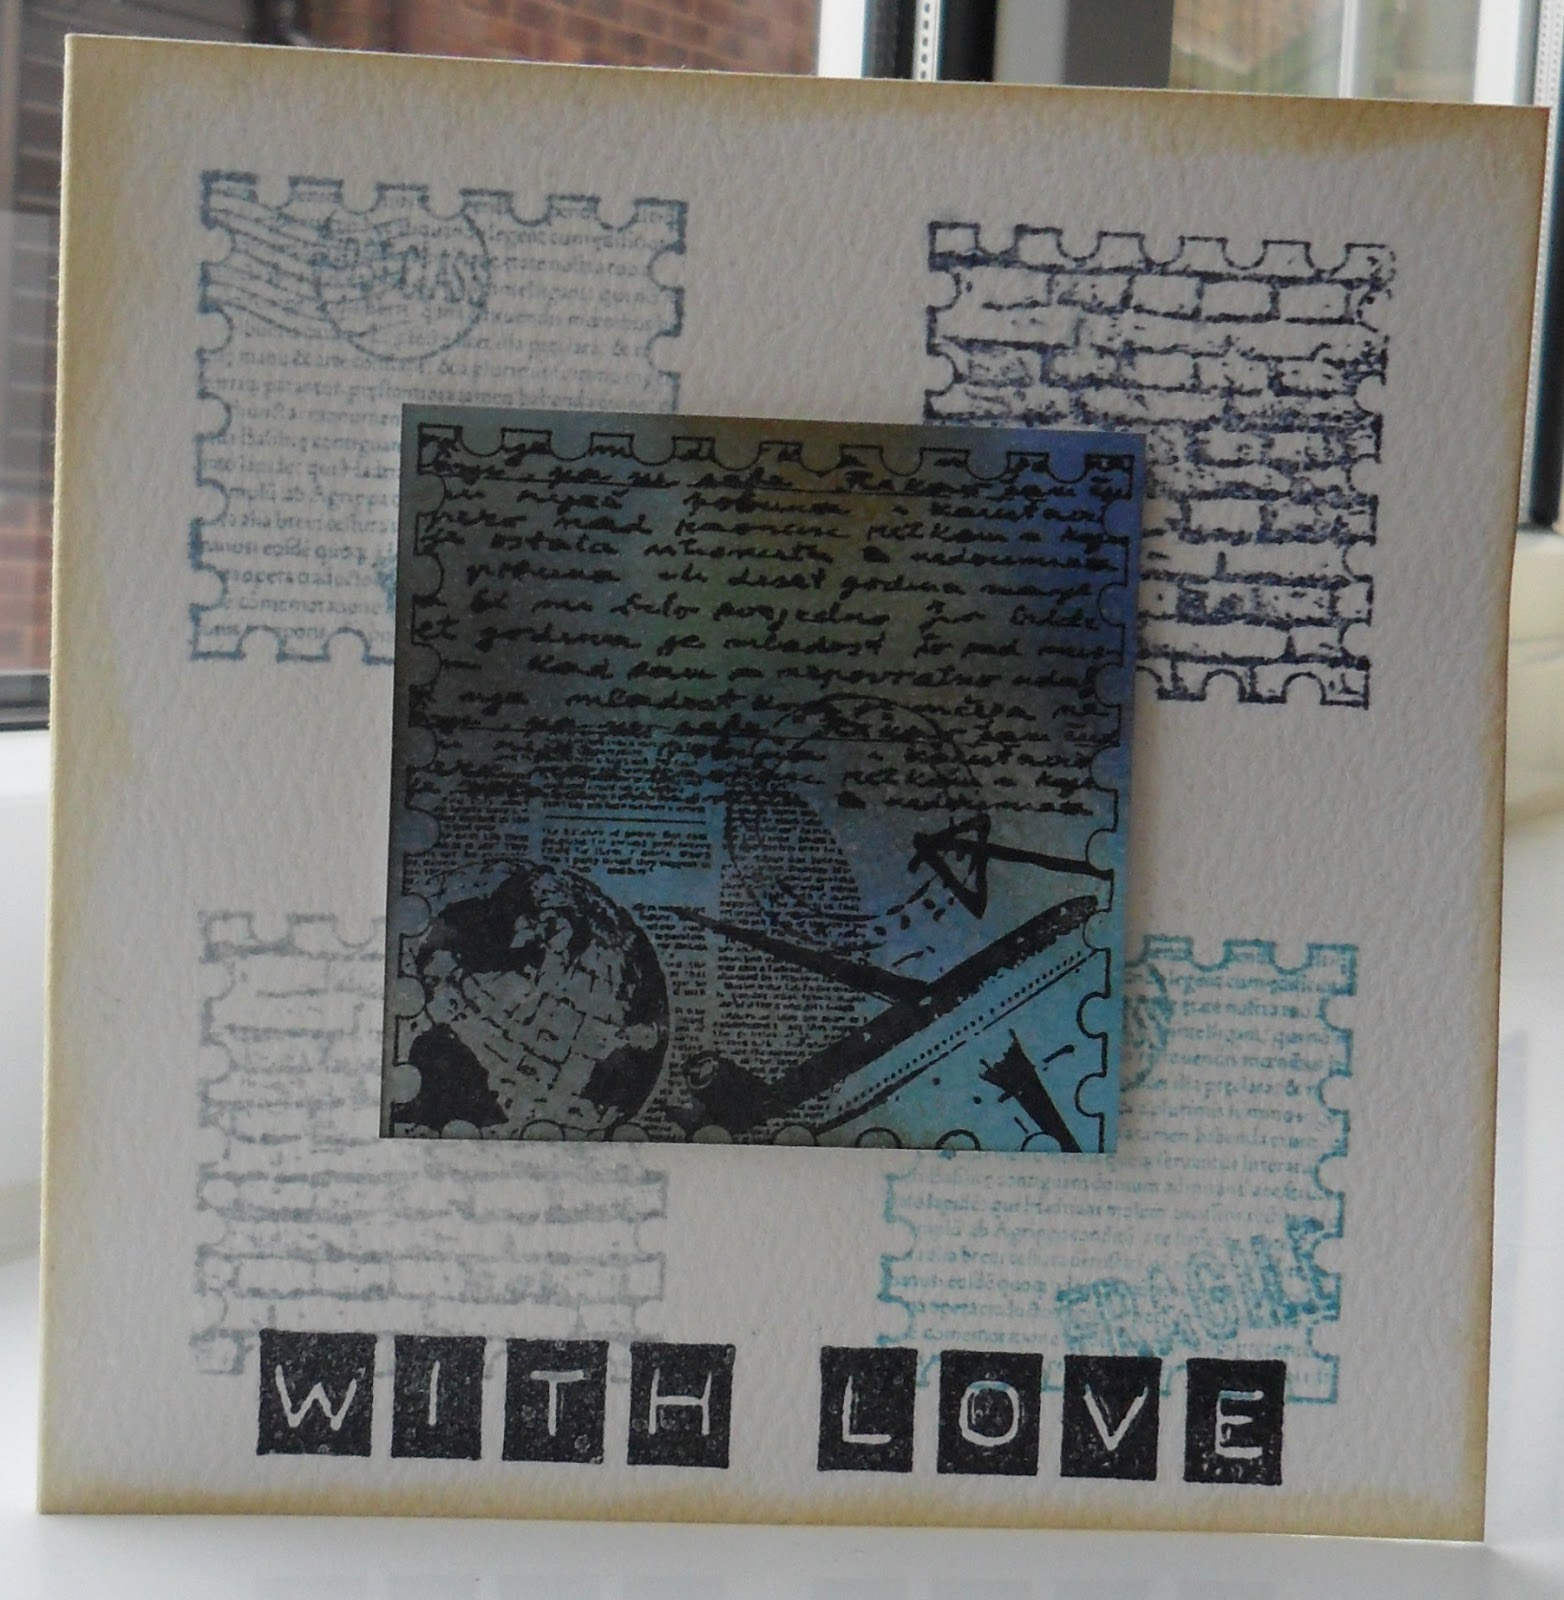
The first 5 tags were created using Distress Ink, Crayons and Spray Stains.

These five tags were made using the newer Distress Oxide products.

My favourite tags were these two:


It was a fast paced 4 hour class but so much fun! The idea behind the quick paced nature was so we didn't over think anything and just 'got over ourselves'. Tim was a fantastic teacher, fun and so down to earth.


This was an early Christmas present from my mum and we had such a great day. Stopping over at the Premier Inn really meant that we were refreshed and ready to get inky. We are so fortunate that Art from the Heart is only an hours drive from us, I love going there for classes.

I can't wait to play with my new supplies and the techniques we learnt.

Happy Crafting!

Terri
x

Saturday, 26 March 2016

~ Off the page ~

Hi there, I hope you are embracing the 4 day Easter weekend and managing to get some crafting done or creating memories to scrap. Today I'm on a baking mission ready for work tomorrow, I'll try to photograph and share them tomorrow.


Today I am sharing the 'Off the page' project from Saturday night at GoGoGetaway. It was designed and taught by Esther who is new to the GoGo team.

We decorated a plain back notebook from The Works and made it in to this beautiful useful piece of stationery.


We added white gesso to the cover then Ranger glue and seal covered with white tissue paper. This was then stamped on using stazon and stencilled using distress ink. The book paper was torn and stamped along with the flags. All then layered up and stuck down using the glue and seal product.

I think this is a lovely book which I may try to replicate as Christmas gifts.

Happy Crafting!

Thursday, 25 February 2016

~ Monochrome challenge - Differences noted ~

Over on Shimelle.com this week is a great challenge featuring Monochromes! Find the original post here. I've never really stuck to one colour plus black/white so I found this challenge particularly good fun.

I've had this photo printed off a while but not really found the inspiration to scrap it. I decided I wanted to use this photo to tell the story of how me & my fiancĂ© have some very different interests. He is follows pretty much any sport which I just don't understand and I have my crafting and scrapbooking. When you first meet some one you worry about your differences but actually it balances out well for us. When he watches sky sports I go up in my craft room to play with pretty paper, but we do make time to do things together. 


This layout was made using patterned paper from various different manufacturers and embellishments from my stash. I wanted the photo and the background to be the main focus for the page so kept the embellishments to a minimum. I used Tim Holtz Distress Inks on plastic packaging spritzed with water to create the blue tones on the background.

Today has been such a happy crafty day as I received 2 pizza boxes from Like For Ever and Hey Little Magpie full of gorgeous stash ready for my retreats in March.

Head back here on Tuesday for a new Stick It Down DT layout and a new process video.

Happy Crafting!

Tuesday, 3 April 2012

~ Gogogetaway March 2012 - Class no.5 ~

As promised yesterday here is the final class from Gogogetaway no.8:

Class no. 5

'Cotton and Calico Chronicles'
By Sheena Rowlands


This is an absolutely gorgeous little book. Sheena made the canvas books herself. We created our own masks using a template and a sheet of acetate.


We placed the masks on the canvas and then sprayed mists over the top. We had to leave the books overnight to dry. In the meantime we created mini layouts which could then be stuck directly on to the pages when dry.


I cut out 16 leaves from patterned paper and then created a vein by sewing along the centre with brown embroidery thread.


I added some star embellishments from the thickers set. All items were glued on using Bostik.

I'm really pleased with how this class turned out. It is a bit different to what I would usually do but I thoroughly enjoyed it.

It's been a sad few days as I have been packing my craft room up ready to move house. On the positive side, I will still have my essentials to hand whilst I'm in limbo staying at my parents house.

Happy Crafting!

Sunday, 18 March 2012

~ Happy Mother's Day ~

Today is Mother's Day here in the UK, unfortunately I am working a 14.5 hour shift so won't be seeing my mum. But I thought I would schedule a post to show you the card I made for her.


This card was made using the February Scrapagogo kit. I love the stamp from the kit it is so cute. The patterened papers are some scraps I had left after I made the challenge layout I posted yesterday. The stamp background was made using worn lipstick and broken china distress inks sprayed with pearlescent mists.

Happy Mother's Day and I hope you get some crafting done!


Sunday, 12 February 2012

~ Happy Birthday to you! ~

Crikey, hasn't it been cold!!! I'm not impressed with having to scrape ice off my car every morning. Hope you are all hibernating in your craft rooms.


This card was made for my boyfriends birthday. I really struggle to make male cards but really like Papermania's Urban stamp collection. I stamped them using blue distress inks of various shades. To make the main feature I inked a piece of card and then stamped over it with archival ink. To finish it off and add abit of glitz I sprayed the card with glimmer mists.

Today I went to a Stampin' Up Card class which I absolutely loved. I'll share what we made later in the week.

Happy Crafting!

Tuesday, 17 January 2012

~ A natural card ~


Well yesterday was my Dad's Birthday so I thought I would share the card I made for him.


I used Distress inks to stamp the background and leaves. I then covered 2 of the larger leaves in distress stickles and 2 in rock candy crackle paint. I added a strip of tissue tape at the bottom and the added some small leaves as a bed for the sentiment.

Happy Crafting!

Saturday, 31 December 2011

~ Tim's Christmas Journal ~


Some of you may remember that on Christmas Day I posted about the Tim Holtz kit I had managed to buy from his Etsy shop for my mum for Christmas. It would only be right for me to have bought myself one as well.


Well here it is fully completed, well I still need to add photos and some journalling but the book is completed as per the kit instructions.


I'm so pleased with how the book has turned out. It is quite small but is going to be a lovely addition to my Christmas decore.


I was very excited to use my new Distress stains that I got for Christmas from my Mum and Dad. I absolutely love the effect they give the kraft resist paper. Not sure if we have the kraft resist paper in the UK but I absolutely love its effect. By adding tissue tape to the top and bottom of a folded piece of paper it created a pocket for adding mementos, recipes, photos etc...

There were also a number of coredination kraft core embossed pages which I simply distressed to add abit of texture. I'm really pleased with the way it has turned out.

Happy Crafting!

Sunday, 25 December 2011

~ Mum's FABULOUS Distress Christmas Present ~

MERRY CHRISTMAS
to all my readers!

This is the amazing present I managed to get my mum for Christmas, I'm sure she is going to love it!


Tim Holtz put 95 of these kits on his etsy store along with some other embellishment packs. They were all sold out within ten minutes. I was fortunate enough to purchase two kits - one for me and one for mum.

Happy Crafting!

Thursday, 22 December 2011

~ It was on a starry night ... ~


I absolutely love this card and it is one of my dad's favourites too! It is so simple and yet so effective. The background was created using a technique I remembered from an earlier edition of Craft Stamper.

1. You make a stencil of the area you want to ink, so in this case I simply got a piece of card the same size as the card and cut out a rectangle in the centre using a craft knife.

2. Adhere the stencil to your card with either repositionable tape or use paper clips.

3. Using Distress inks and a blending tool apply ink to the inside of the stencil being careful around the edges. I used stormy sky, broken china and chipped sapphire to create the above colour.

4. Once the background is dry, stamp your image using black ink and add stickles if desired.

A simple but effective card which would be great if you have a lot of cards to post as it is a flat card with no embellishments that are likely to fall off. These would also be an easy card to reproduce if you had many to create.

Happy Crafting!

Saturday, 26 November 2011

~ It's finally finished ... ~


... and just in the nick of time! Just long enough to fill the boxes ready for the first of December!


This embellishment was actually destined for our garland but I decided it would be perfect for my advent calendar and would actually tie it in to our Christmas decore very well. It was a piece I bought from Hobbycraft to add to our Marks and Spencer Garland. I think it was only 99p ... a bargain! I simply trimmed the wire stalk with my clippers and stuck it in place with some silicone glue.

This week has been so hectic! I had 2 lunch dates, a coffee morning, a day of shopping and my first Christmas meal of the season. I doubt next week will be any better as I need to get my homemade xmas pressies made and decorated.

Happy Crafting!

Monday, 21 November 2011

~ Making the snow sparkle ... ~

For the last 2 weeks I have been receiving emails from the Online Card Class 'Christmas Holiday Bootcamp'. This is one of the techniques shown.

You firstly emboss your chosen cardstock, I used a snowflake embossing folder and put it through my Big Shot. Then apply 2-3 colours of distress inks using a blending tool. Once dry spritz with a pearlised mist, the class said to use a homemade perfect pearls mist in a mister but I used a white pearl mica mist and that worked as well.

As the background worked so well and I already had inky fingers I made a selection of backgrounds and tags ready to use on some cards.

I've got a busy week ahead of me ... I'm out for lunch twice and then a work Christmas meal on Friday night so I might not fit much crafting in this week, we'll have to see.

Happy Crafting! 

Thursday, 18 August 2011

~ Home decor ~

This is a frame I bought from Next and made my own. It currently sits on the wall in my lounge.


To make the pieces of artwork I used distress inks to colour the edges of the card, then stamped the verse in the centre. I made a mask of the verse then stamped images aound the verse overlapping them using different coloured inks. Then remove the mask to reveal the untouched verse.


These were simply made by colouring the edges with distress inks then stamping a Tim Holtz stamp in peeled paint distress ink down one side then attaching a pendant on the other. Bakers twine then used to decorate.

Kitten update: Today Oscar and Millie went for their first vaccinations. They were very brave.

Unfortunately today has not held any crafting time for me and I'm not sure tomorrow will either. I'm desperate to play with my Scrapagogo kits that have sat unused for the last few months.

Happy Crafting!